
Weave a Scarf for Your Valentine
/
Valentines day will be here before you know it so it's not to early to begin thinking about what you want to give to your valentine. If you're looking for a great, handmade project, I have just the thing. This is easy, really. I am a weaver and have a large floor loom but this project does not require any such special equipment. Even your children, if they have some "sticktoitiveness" to finish a project can do this.
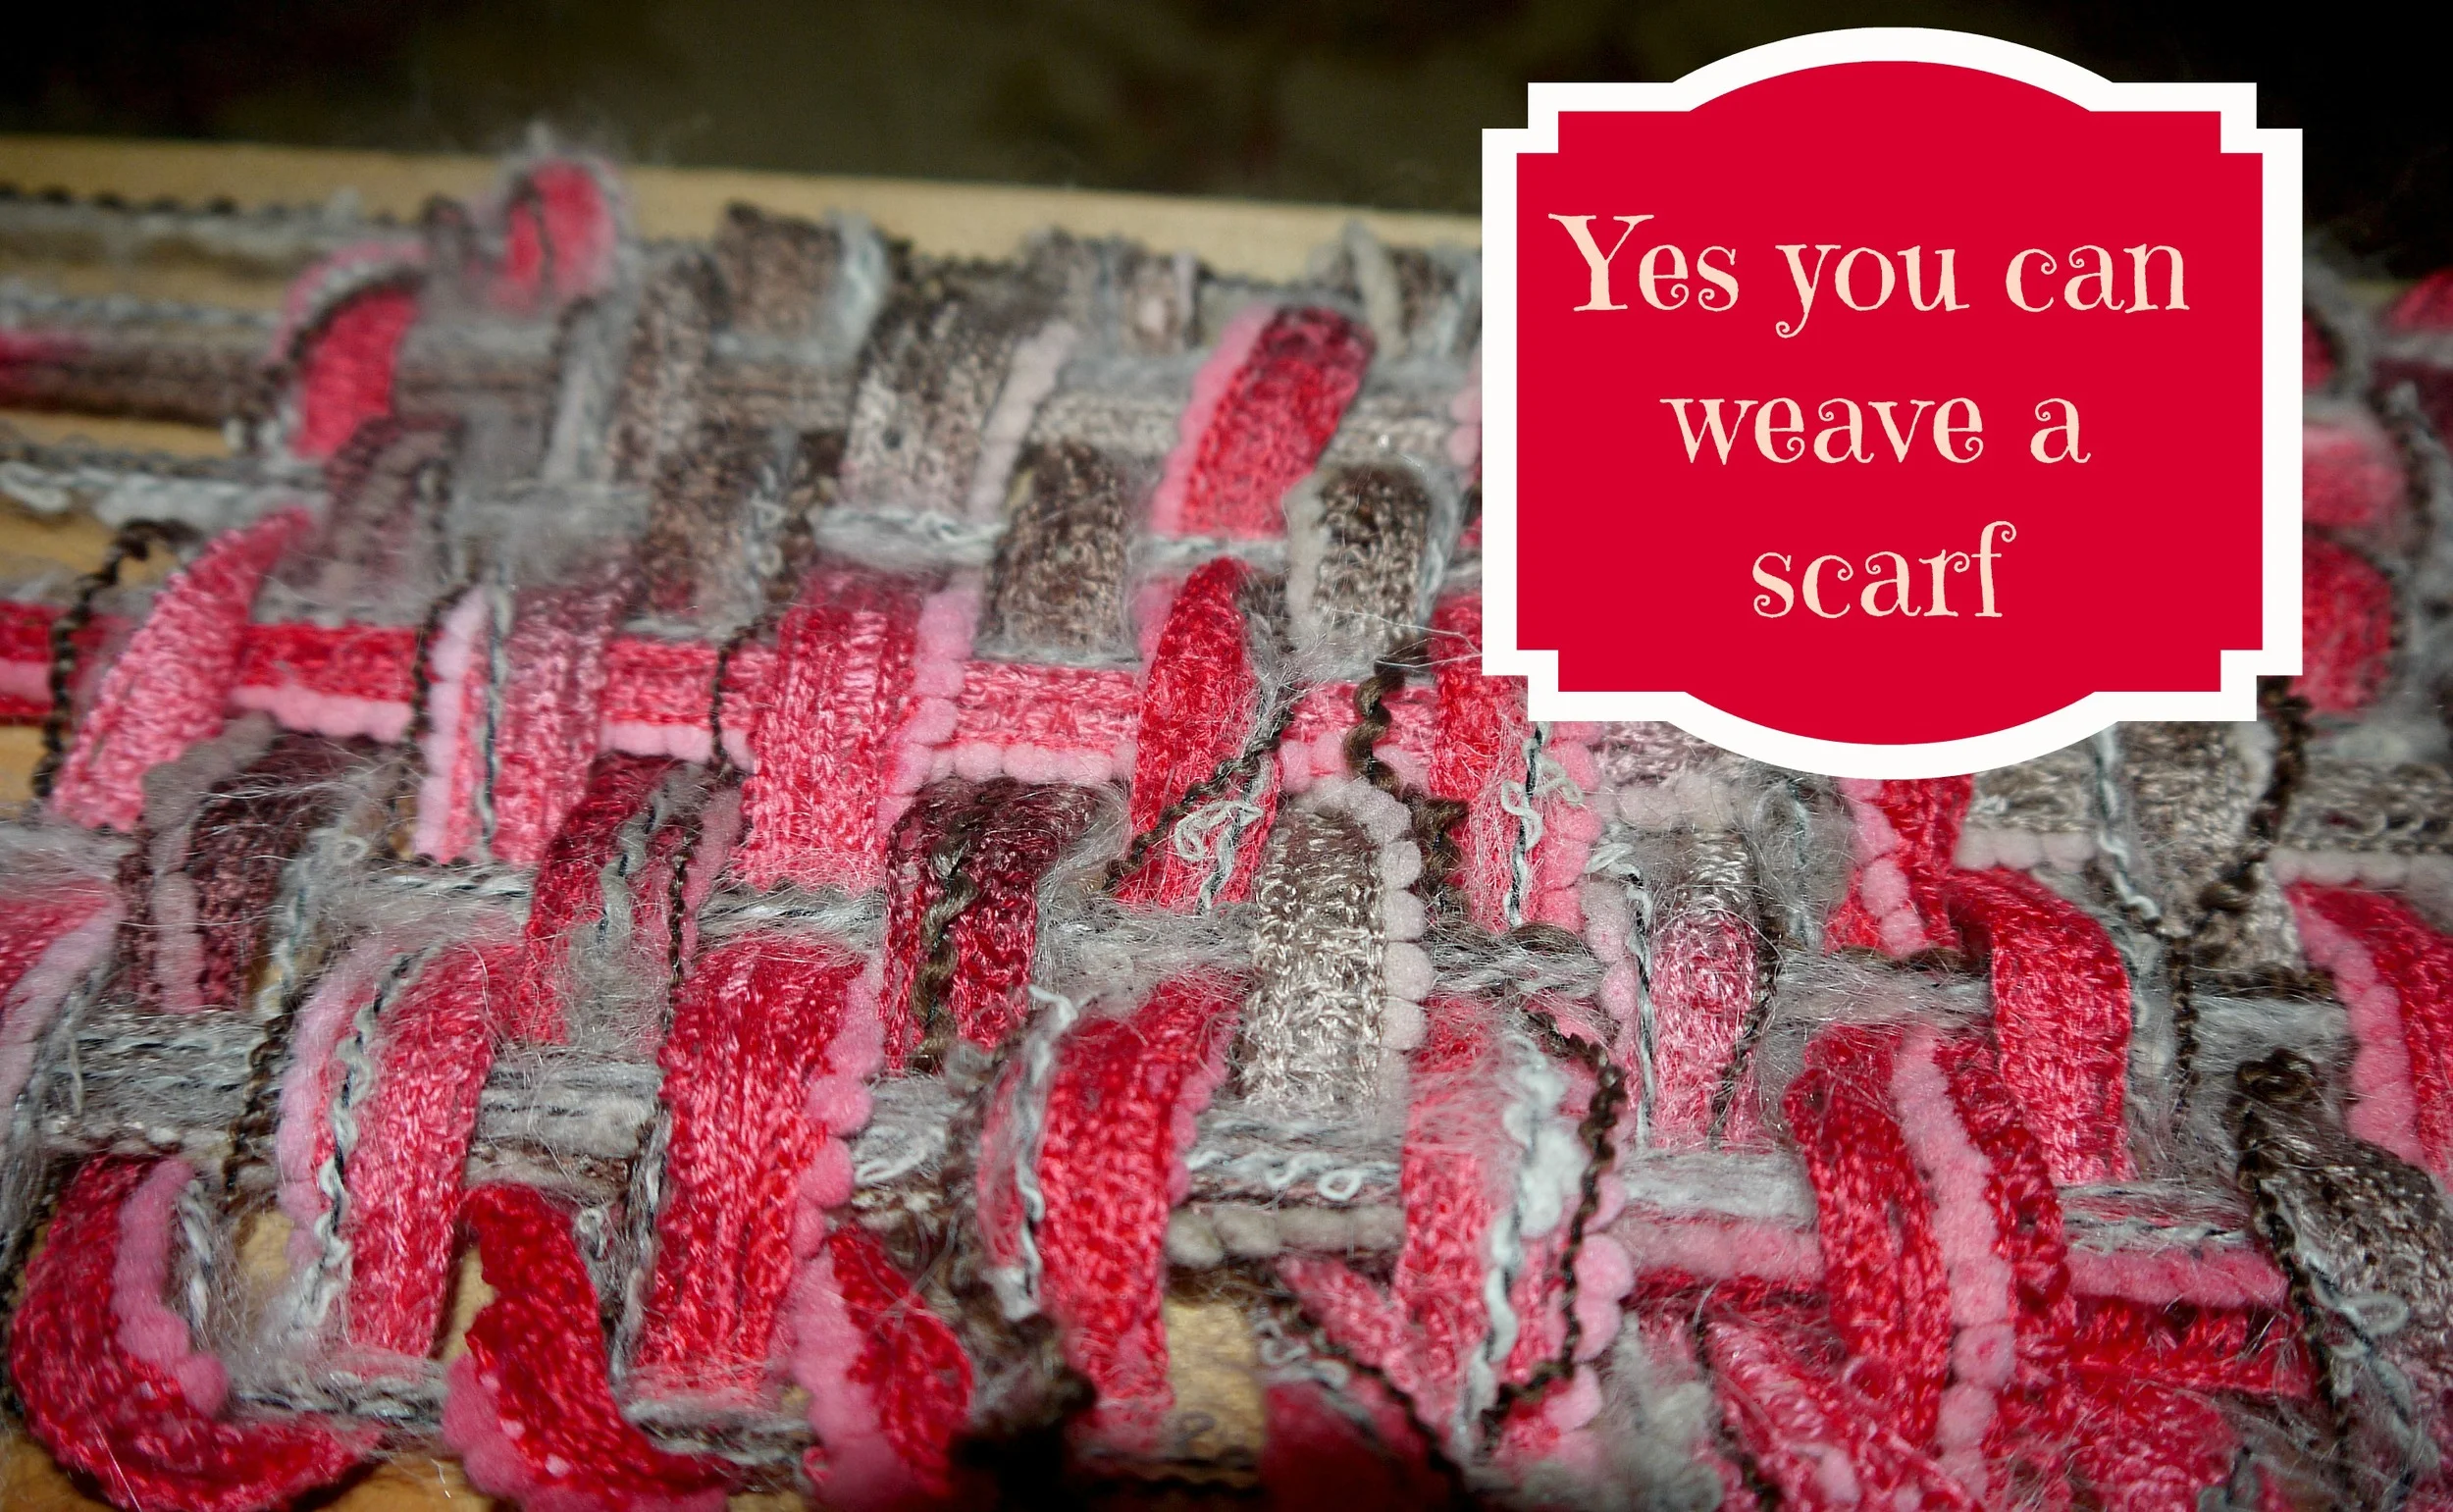
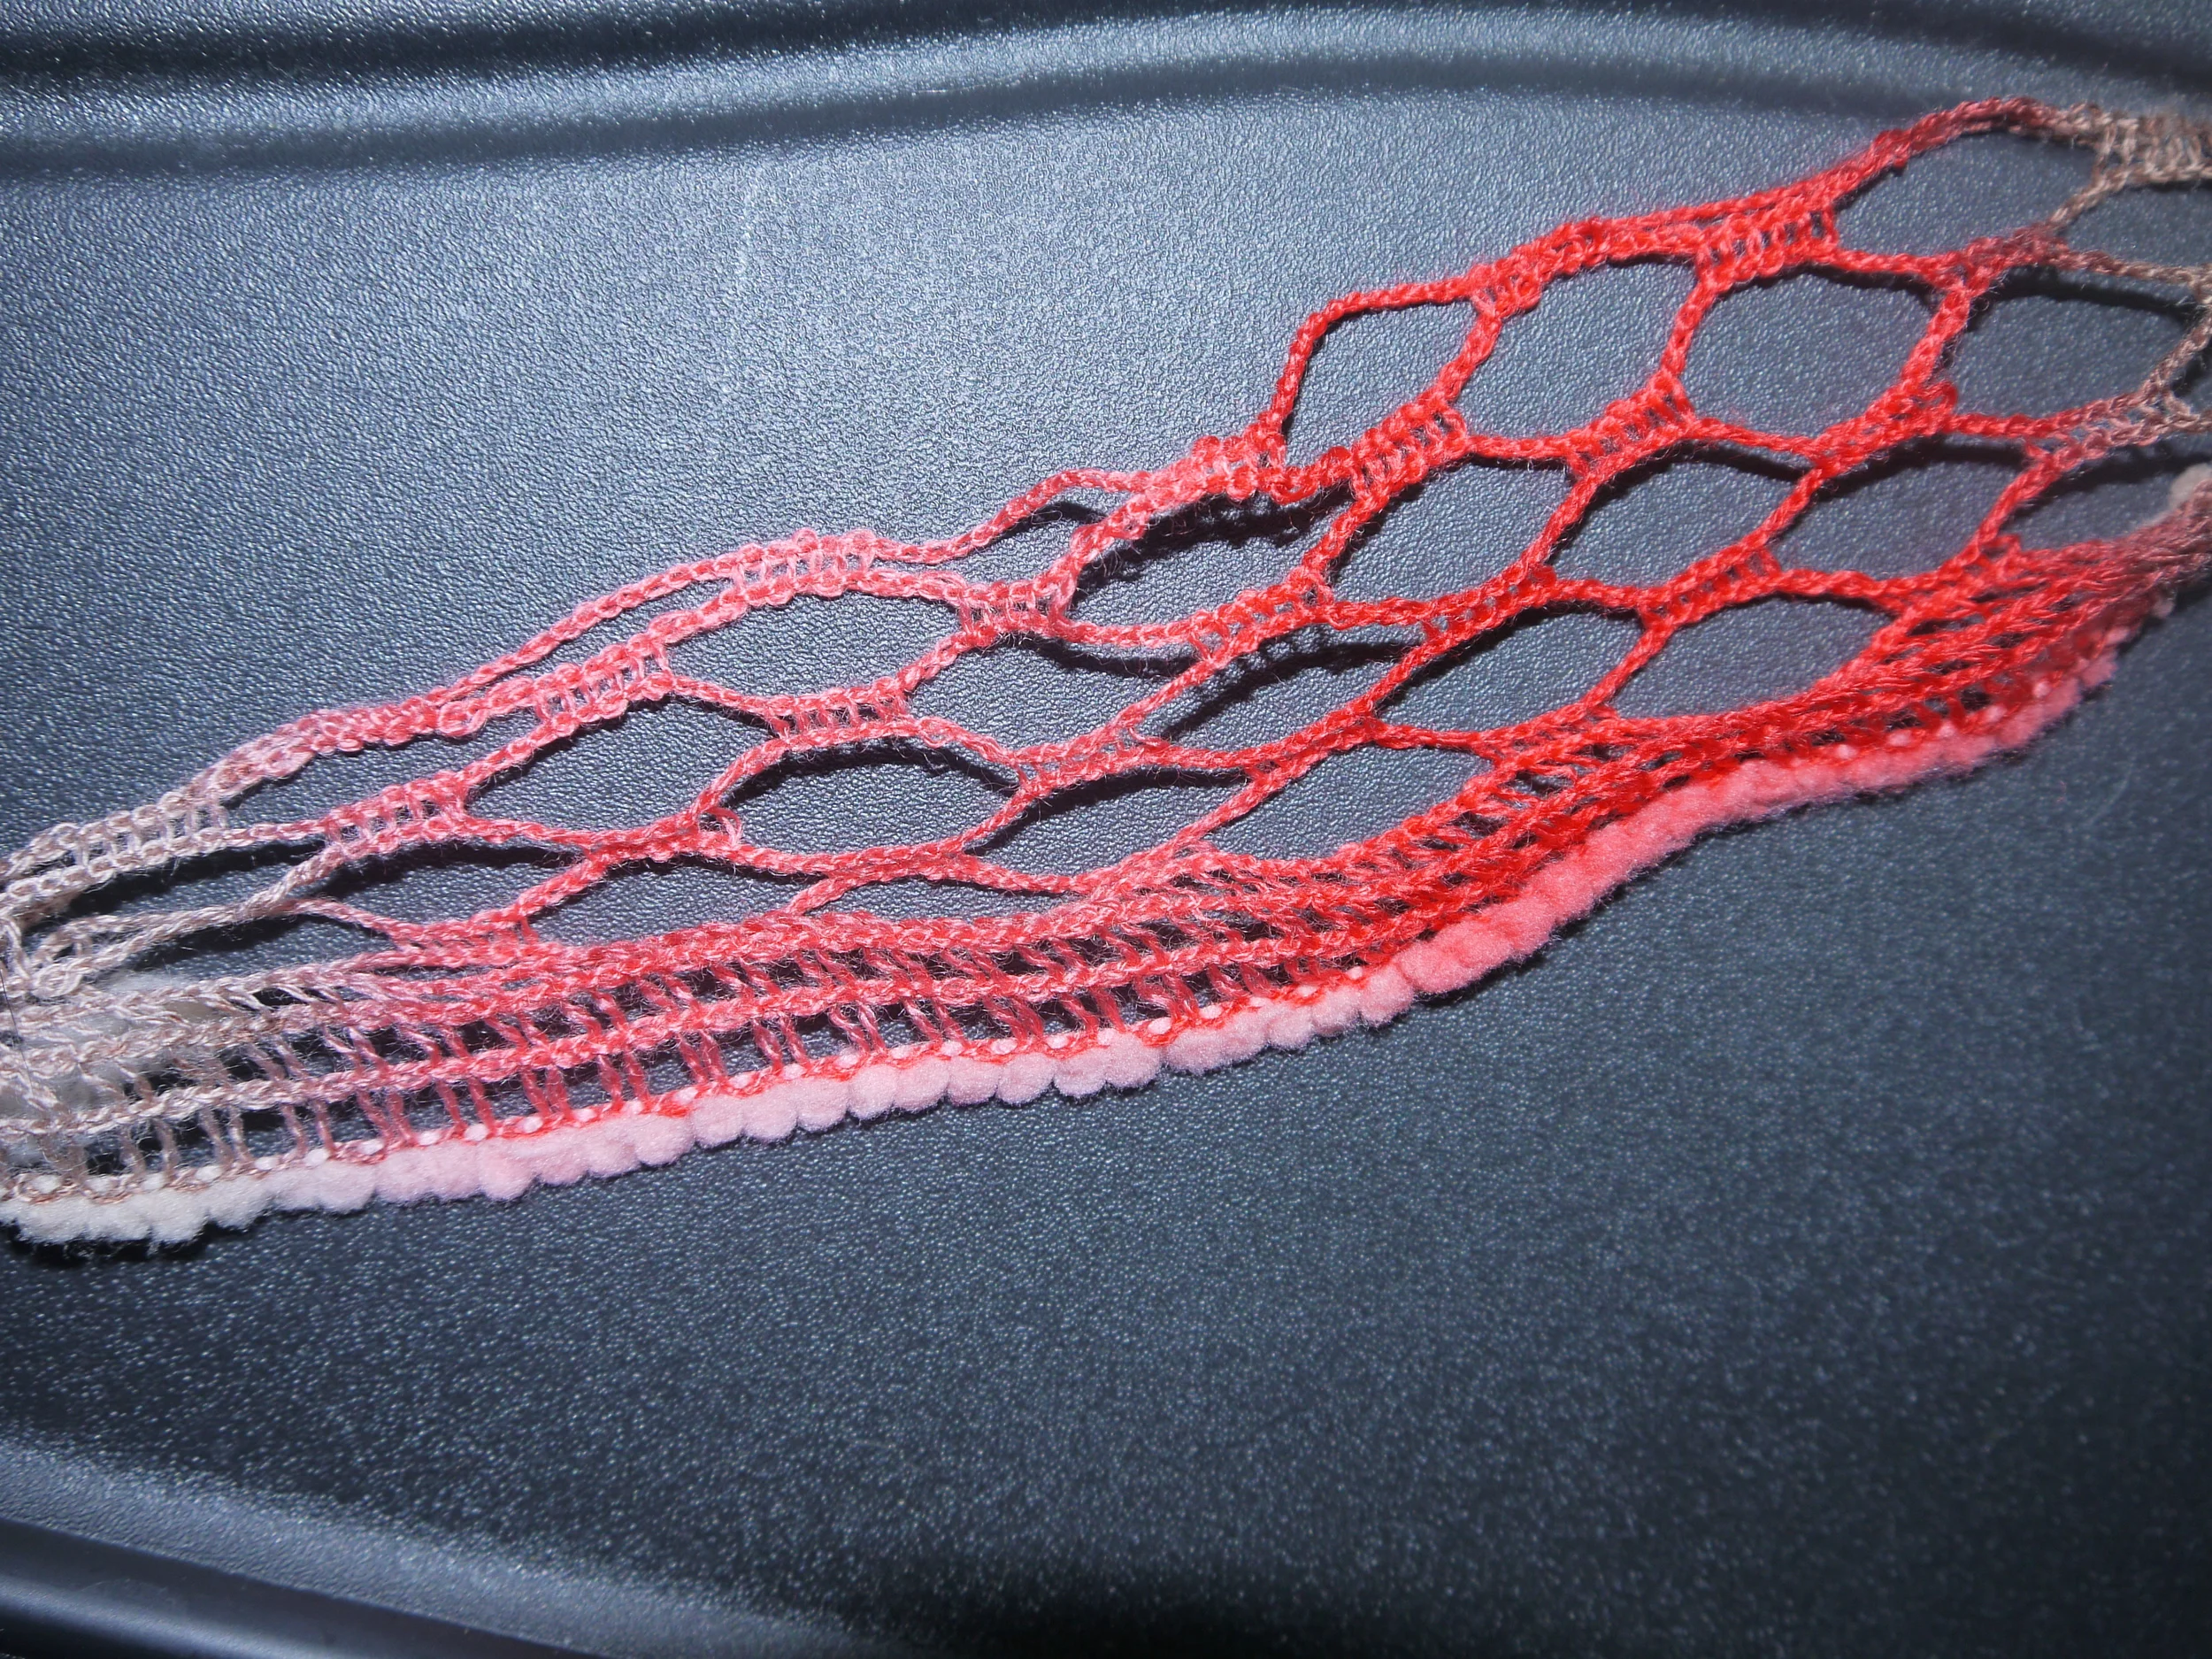
Here's one of the scarves I made using this technique.
I want to apologize right up front for the quality of the photos in this tutorial. I tend to do many project in the evening while we are watching a movie or something. I'm like that, can't sit still and just watch a movie, have to be doing something. But it's always difficult to get good photos at that hour of the day.
The first thing you are going to need for this project is yarn. For this project, I used three different yarns. Two of which I had in my stash which were rather fine in diameter (you can see in some of the photos) but the third one, was something I found in a markdown bin. It really was meant to be used in a different manner than I used it (in order to see the pretty lacyness), but I tried it out for this technique and I really like how it turned out.
I can't really tell you how much yarn you need because it will depend on many factors such as how tightly you weave, the bulkiness of your yarn, the length and width of your scarf, the length of your fringe, etc. I used approximately 1 1/2 skeins of the colorful yarn and approximately equal length of the other two.
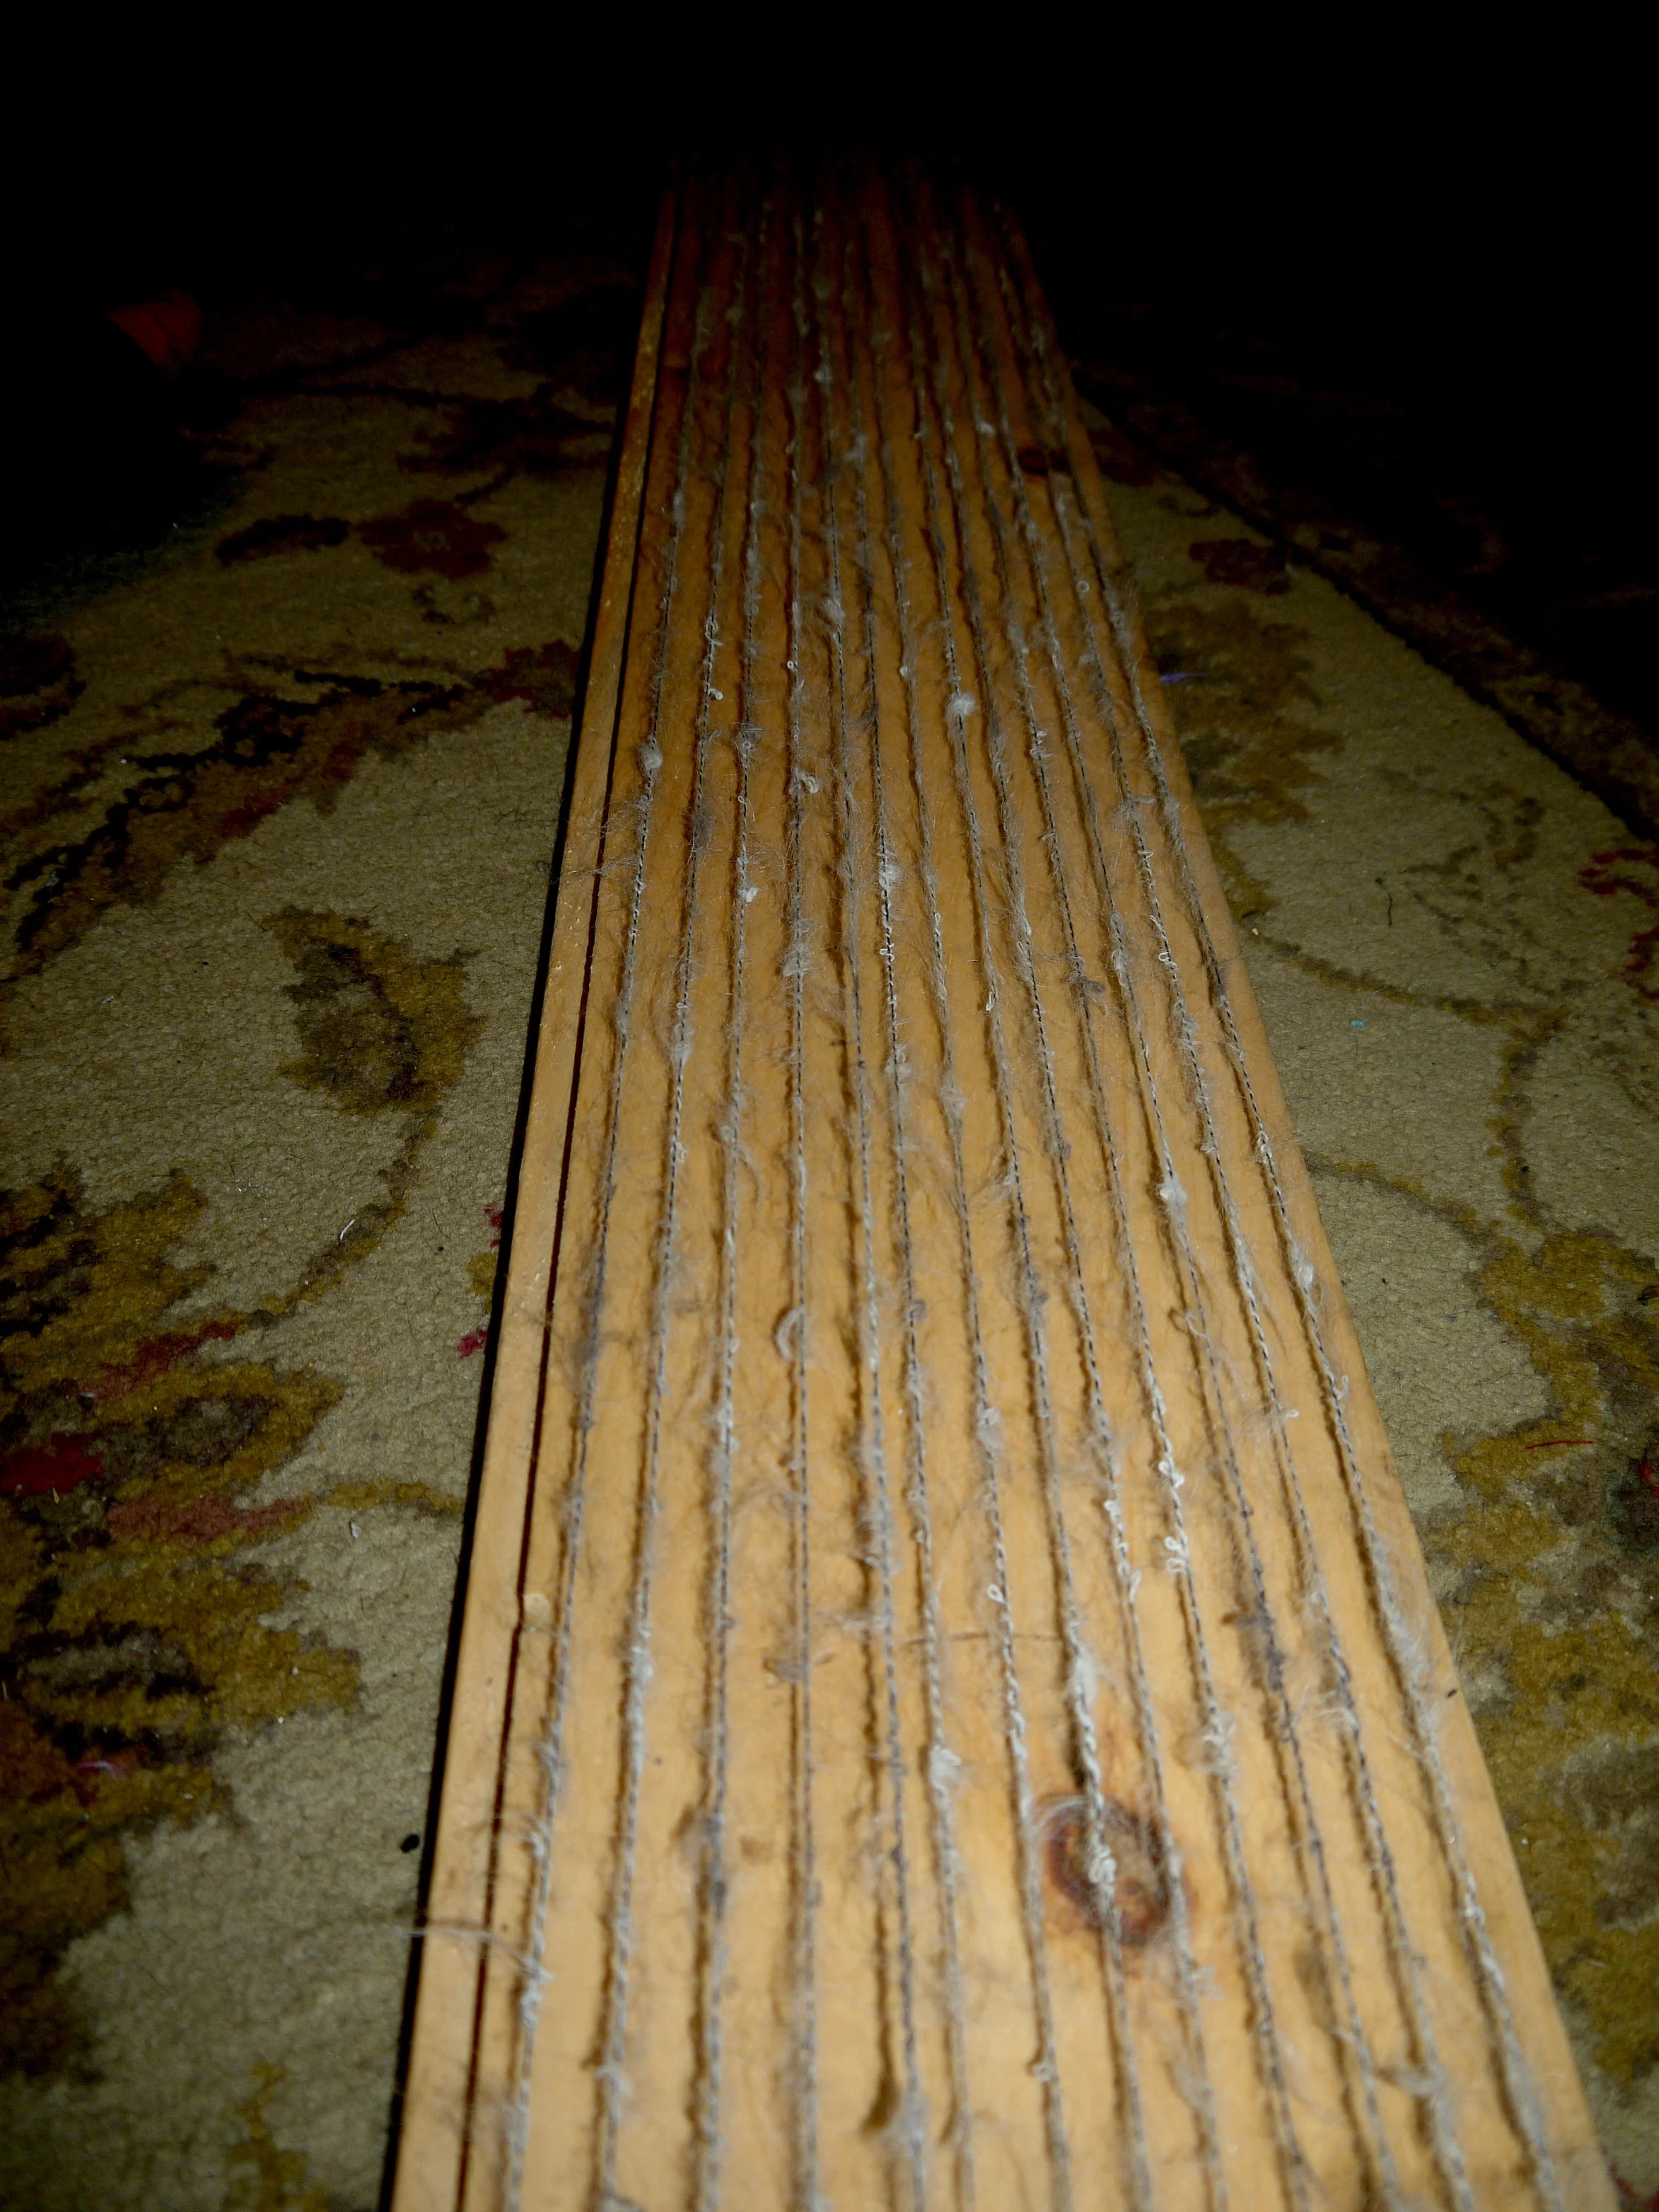
The second thing you are going to need is a board, yup, any old board. Well, truthfully, it should not be too "rough cut" because the yarn snagging on the "roughness" will drive you crazy, but other than that, any old board will do. I chose a board which measures 6 1/2' x 8". It's just a pine board I found in the barn which was left over from a house project. You do have to make sure the board is long enough to make the length scarf you desire. Make sure to include the fringe length when determining your length. It is best to measure a scarf you currently own to determine your desired length.
Once you have selected your board, hammer a row of nails on each end of the board. You don't have to be too fussy about spacing. I nailed 7 nails on each end of my 8" wide board. I placed one approximately in the center, one on each edge and then spaced two somewhat evenly in each space. For nails I just used whatever I had in the barn, rust and all.

Next you are going to warp your "loom" (your board). The warp threads are the threads which will run the length of your board, the ones you will weave on. You have to choose one of your yarns for the warp. Whichever yarn you choose for the warp will also be the fringe, so think about what would like nice for fringe at the ends of your scarf. If you want more than one of your yarns for fringe, I will address that in a moment.
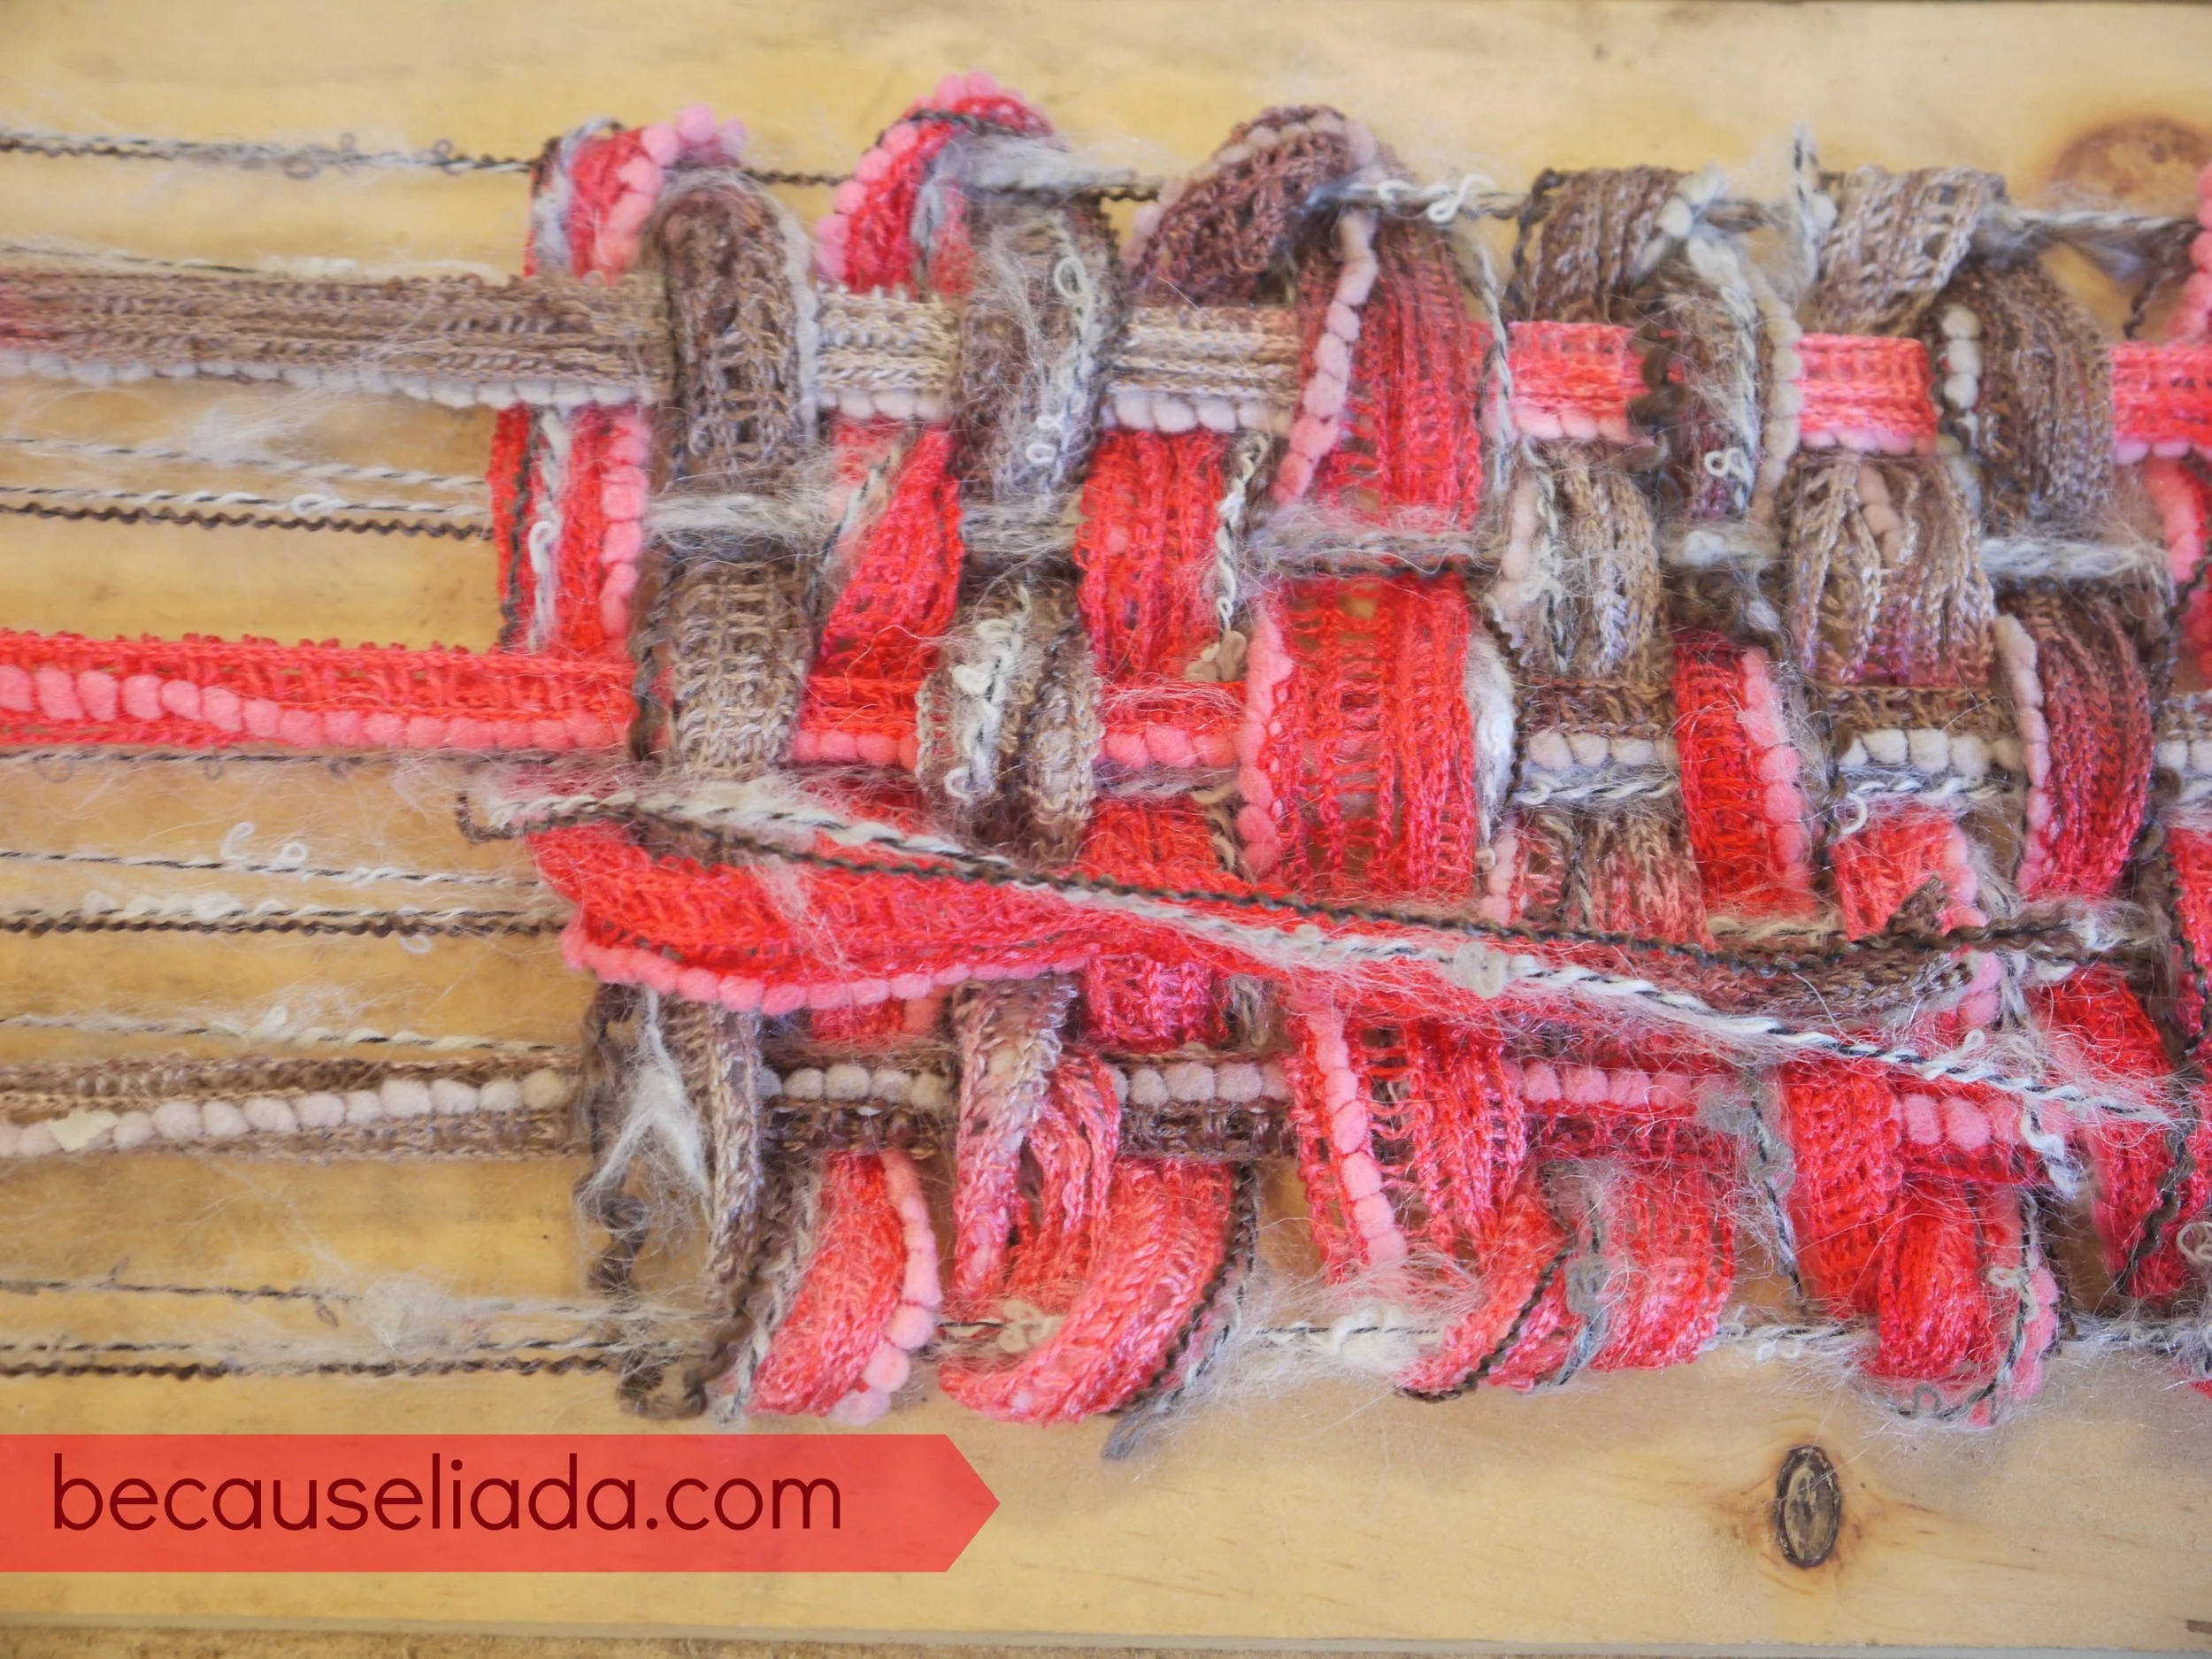
Take one of your yarns and tie it onto one of the nails at an edge. Then run the yarn down the length of the board to the nail at the other end. Run the yarn around the nail and back to the other end. Do this back and forth until the width of the board is covered with warp threads. Back and forth, and back and forth, when you are done it should look like this:
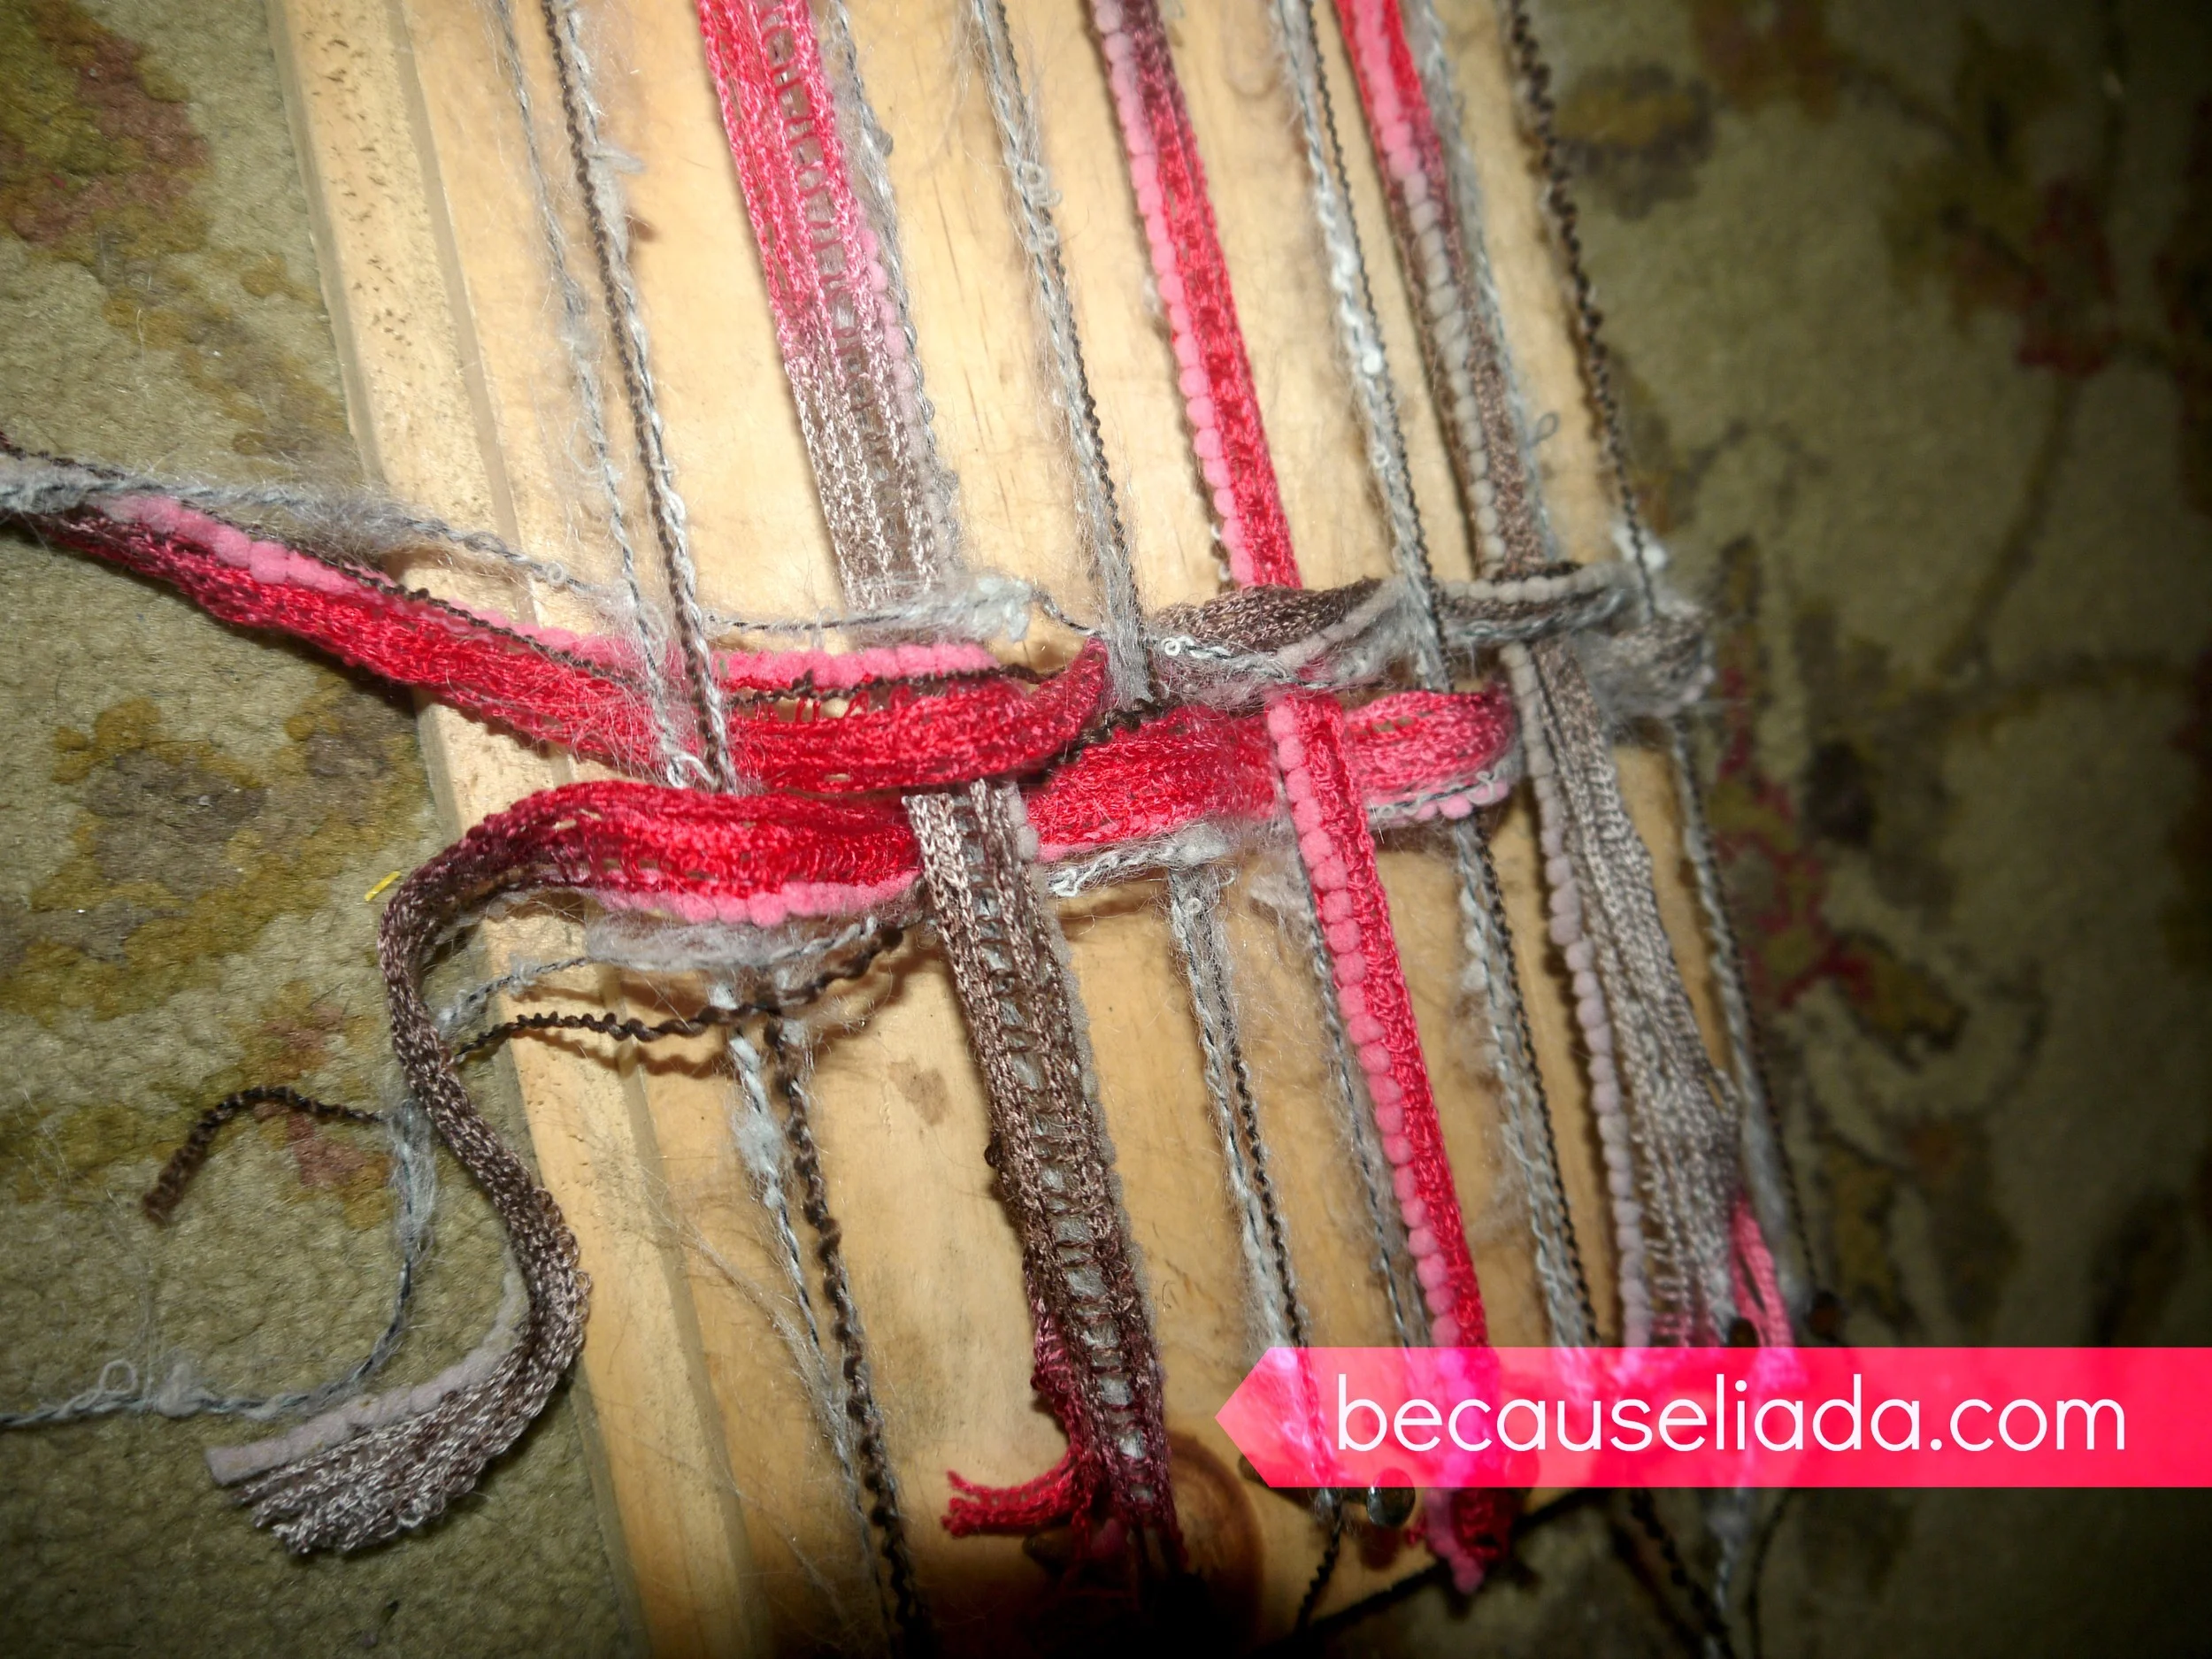
I mentioned before how you can use more than one of your yarns for your fringe, here's how you can do that. I decided that the warp I had on my board was going to make for boring fringe and wanted to add more warp threads. You can either use one yarn as I have shown, or you can completely warp right over this yarn with a second yarn, or you can do what I did. I took another yarn and warped just a few threads by tying the yarn on one nail and running it to the other end and tying it off. I did that on every other nail rather than run it back and forth over the whole board. You can tie a different yarn on each nail and change it for every nail or run the same yarn back and forth, whatever strikes your fancy. Boy, this is a hard thing to explain so feel free to ask any questions.
If you decide to warp with more than one yarn, when it comes time to weave, you will just treat the doubled up warp threads as one thread.
Like a knucklehead I forgot to take a picture when I had the board entirely warped with the other yarns but you can make them out in the next photo.
Next you need to find something to use for a shuttle. I used a bobbin from one of my shuttles but If I did not have this I would just use a piece of cardboard, that would work just as well. You need something which you can wrap the yarn around, it will hold the yarn as you pass it, over, under, over and under the warp threads. I chose to do my weaving will all three of the yarns which I was using treating them as though they were one yarn. The other way to do this is to weave with one yarn, then switch and weave with the next yarn which would create a scarf which has a section of color at one end, then a section of a different color further down the scarf. You really have to think out your project in advance. I wanted my scarf to look consistent the entire length so chose to weave with the same yarns for the entire length. I hope this all makes sense.
When you fill your "shuttle" with yarn, you want to put on enough so you don't have to keep filling the "shuttle" as you weave. or have to change yarn constantly while you are weaving, however, don't fill it so much that weaving over and under the warp threads is going to prove to be difficult from it being too bulky.
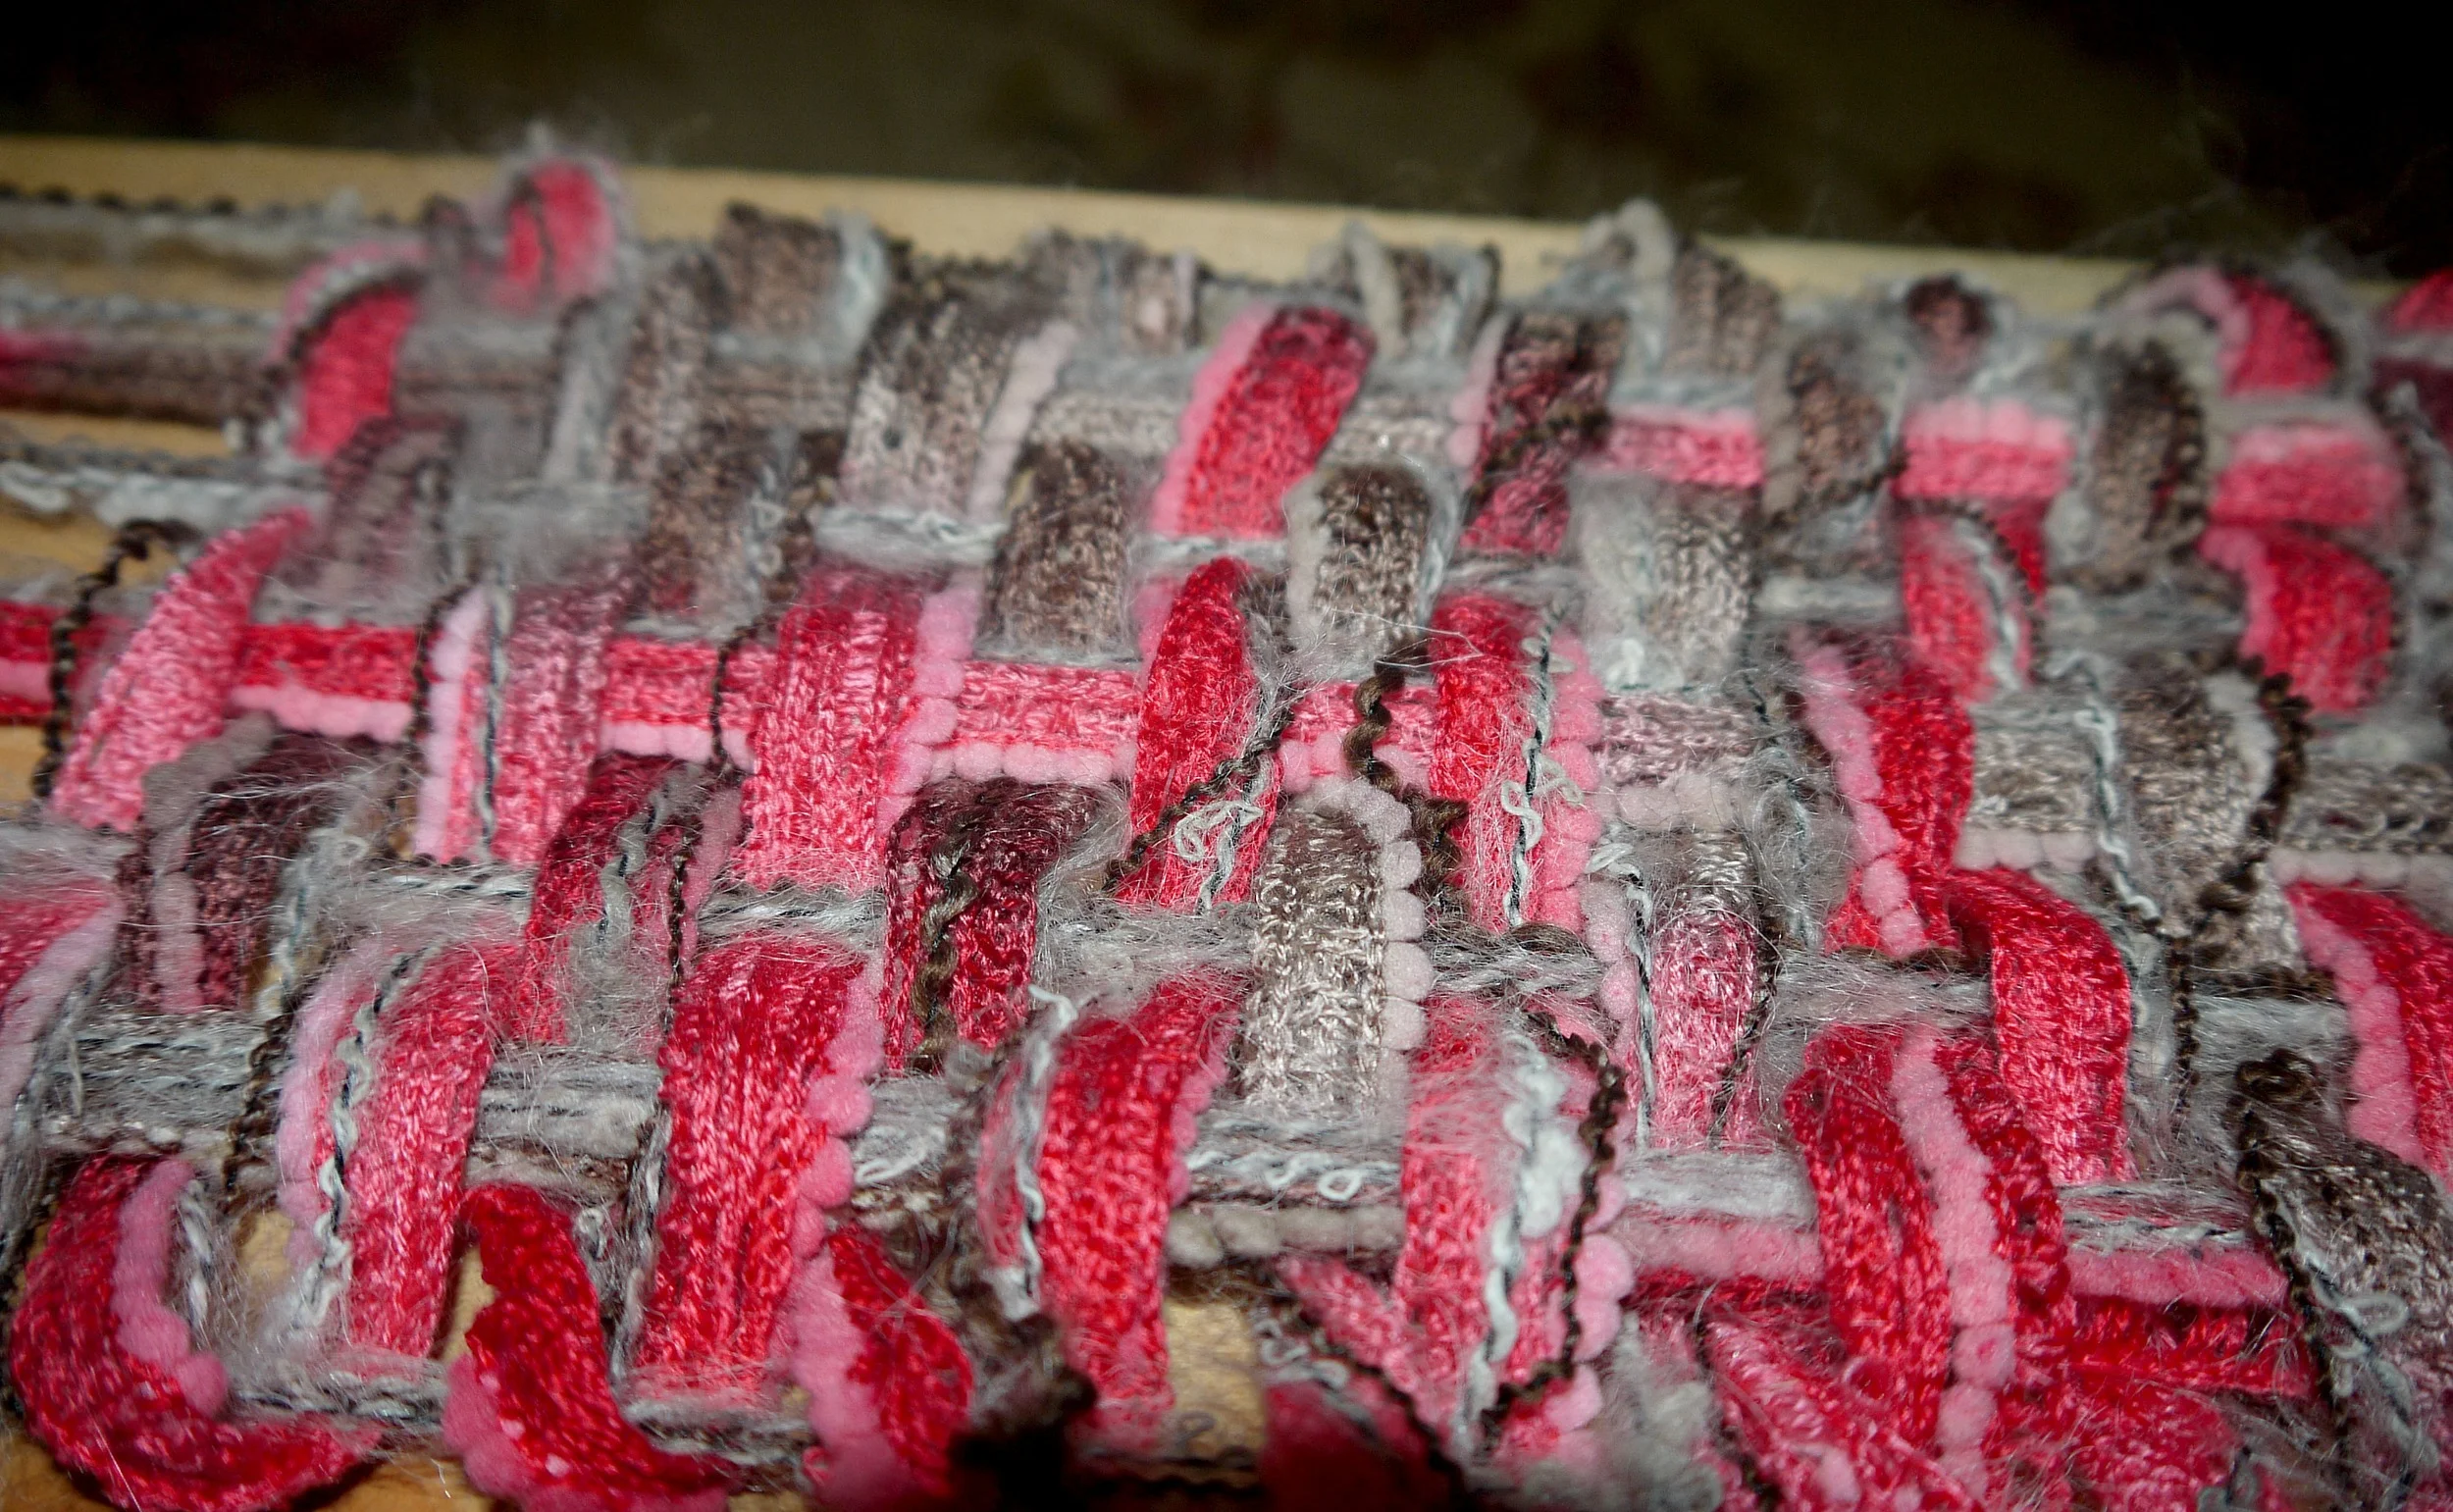
Now start weaving. Decide how long you want your fringe and start your weaving approximately that distance from the nails. When you get to the end of the row, go around the edge yarns and go back across in the opposite over, under pattern. When you switch directions at the end of a row make sure not to pull in your edge to tightly. Your edge is called you "selvage" and if you pull it too tightly the selvages will pull in for the entire scarf length, you don't want that.
You will have to decide how tightly you are going to weave. What I mean is, how tightly you are going to weave one row up against the last row you wove, Whatever you choose you need to be consistent the entire length of the scarf. I chose to weave fairly loosely. Here's a few things to keep in mind:
- Looser weave makes the inches add up faster.
- Looser weave may require some hand stitching when you are done weaving in order to "hold" or "tack" your woven rows somewhat in place so they don't "slide" around to much on the warp threads. This will be especially important if you weave with anything "ribbon" like or silky textured which wouldn't "hold" to the other yarns well.
- Tighter weaving will use more yarn and will take longer but will "stay where you weave it" better.
After you have woven quite a bit, you are going to run out of yarn on your shuttle. How you handle this will depend on how tightly you are weaving. If you are weaving your rows tight together, simply weave your yarn right to the end of the yarn which is on your shuttle, then start the next yarn right where the last one left off only overlap the ends of the yarns by a few inches and then keep on weaving. If you are weaving loosely, you will have a bit more work to do at the end but I usually weave loosely when I'm using my board loom. Here's what you do if you are weaving loose rows: weave all the yarn on your shuttle except when you get close to the end you want to leave a couple inches loose, then just take the end and lay it down over the finished part of the scarf (like in the photo below). Then start the next yarn where you left off on the last yarn and leaving a few inches, leave that end lying down with the other end. You will deal with all these ends when you are done with all the weaving.
The second photo did not come out very well and I apologize but I think you can get the basic idea.
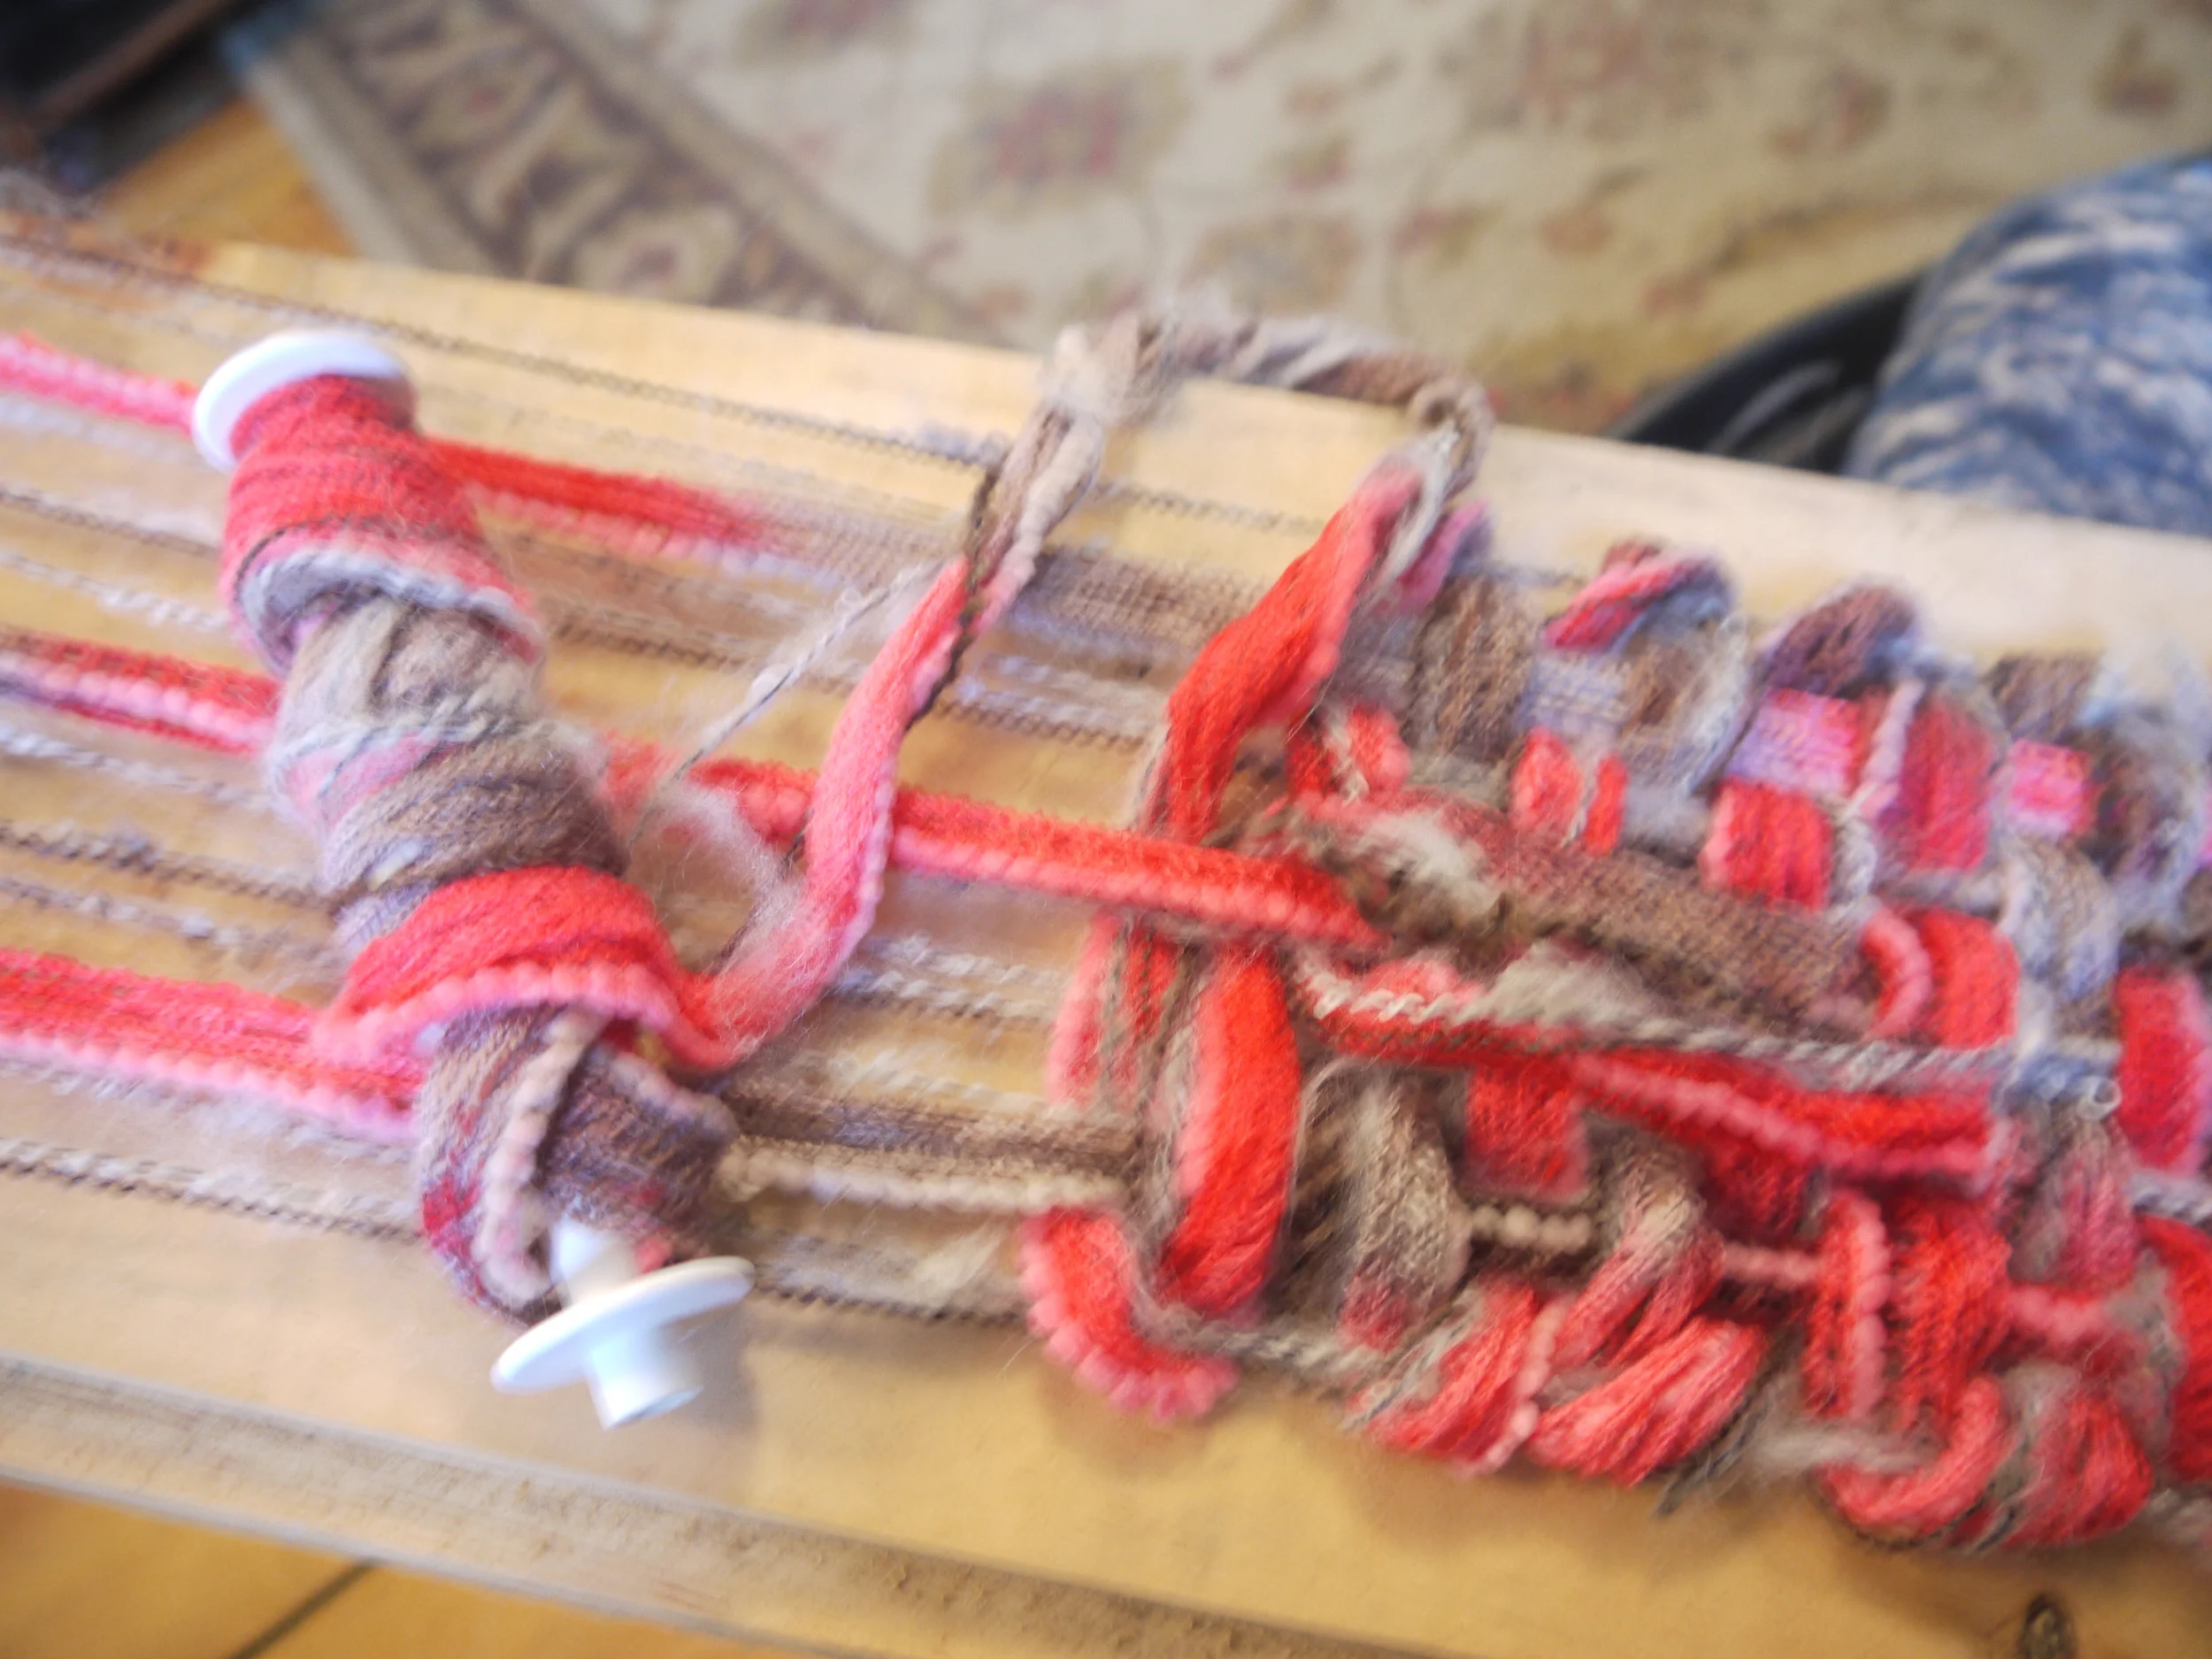
I had to fill my "shuttle" 3 times to weave the length of the scarf.
When you are done weaving, it is time to deal with any ends you may have hanging loose. This is going to be difficult to explain so bear with me. This is easiest to do with the scarf still on the board. Take one of the ends which you left hanging loose and cut it so you only have about 2" to deal with. Without messing up your rows of weaving too much, with your fingers gently weave the end into your weaving by tucking it in. Then take the end of the other yarn and weave it in also by weaving in a continuous pattern as the first end as though they are one yarn. You want the ends to overlap each other by about 2" or so. Then take a needle and some thread in a color which won't show on the yarn and stitch a few tacking stitches. You want to make sure your stitches go through both yarns. Do this for each of the ends you have to deal with. If you don't do these tacking stitches and you wove loosely the ends are likely to unweave themselves over time.
After you deal with any ends, you have to decide if you think the weaving is going to "slide" up and down on the warp threads while it is being worn, and if that is something you want to prevent or not. I felt this scarf may do that. To prevent the sliding I stitched a few taking stitches in various places up and down the length of the scarf. Again, this is easiest to do while the scarf is still attached to the board. If you think it would be nice, you could stitch on a few buttons, or other embellishments when you do these tacking stitches.
Once you are done with any tacking stitches, you are ready to remove the scarf from your "loom". Simply cut the warp threads as close to the nails as you can.
Once you have the scarf off the loom you have to do something with the fringe so your weaving does not come undone at the ends. There are many ways to finish the end of your scarf, I will tell you the easiest. First, you can either machine or hand stitch right across the last row of weaving. This will hold everything in place so your weaving will not come undone and will leave your fringe looking pretty much just like it did when you cut it off the loom. The other thing you can do is take a couple of the fringe threads and tie a knot right up next to the scarf, Then do this with all the fringe across each end of the scarf. This also will hold the weaving in place. If you choose to do this make sure when you tie your knots that you take threads from each side of the weaving when you tie them or the weaving will still come undone. If you look at the end of the weaving you'll see what I mean by "each side". I finished this scarf with the knot tying technique, you can see it in the photo below.

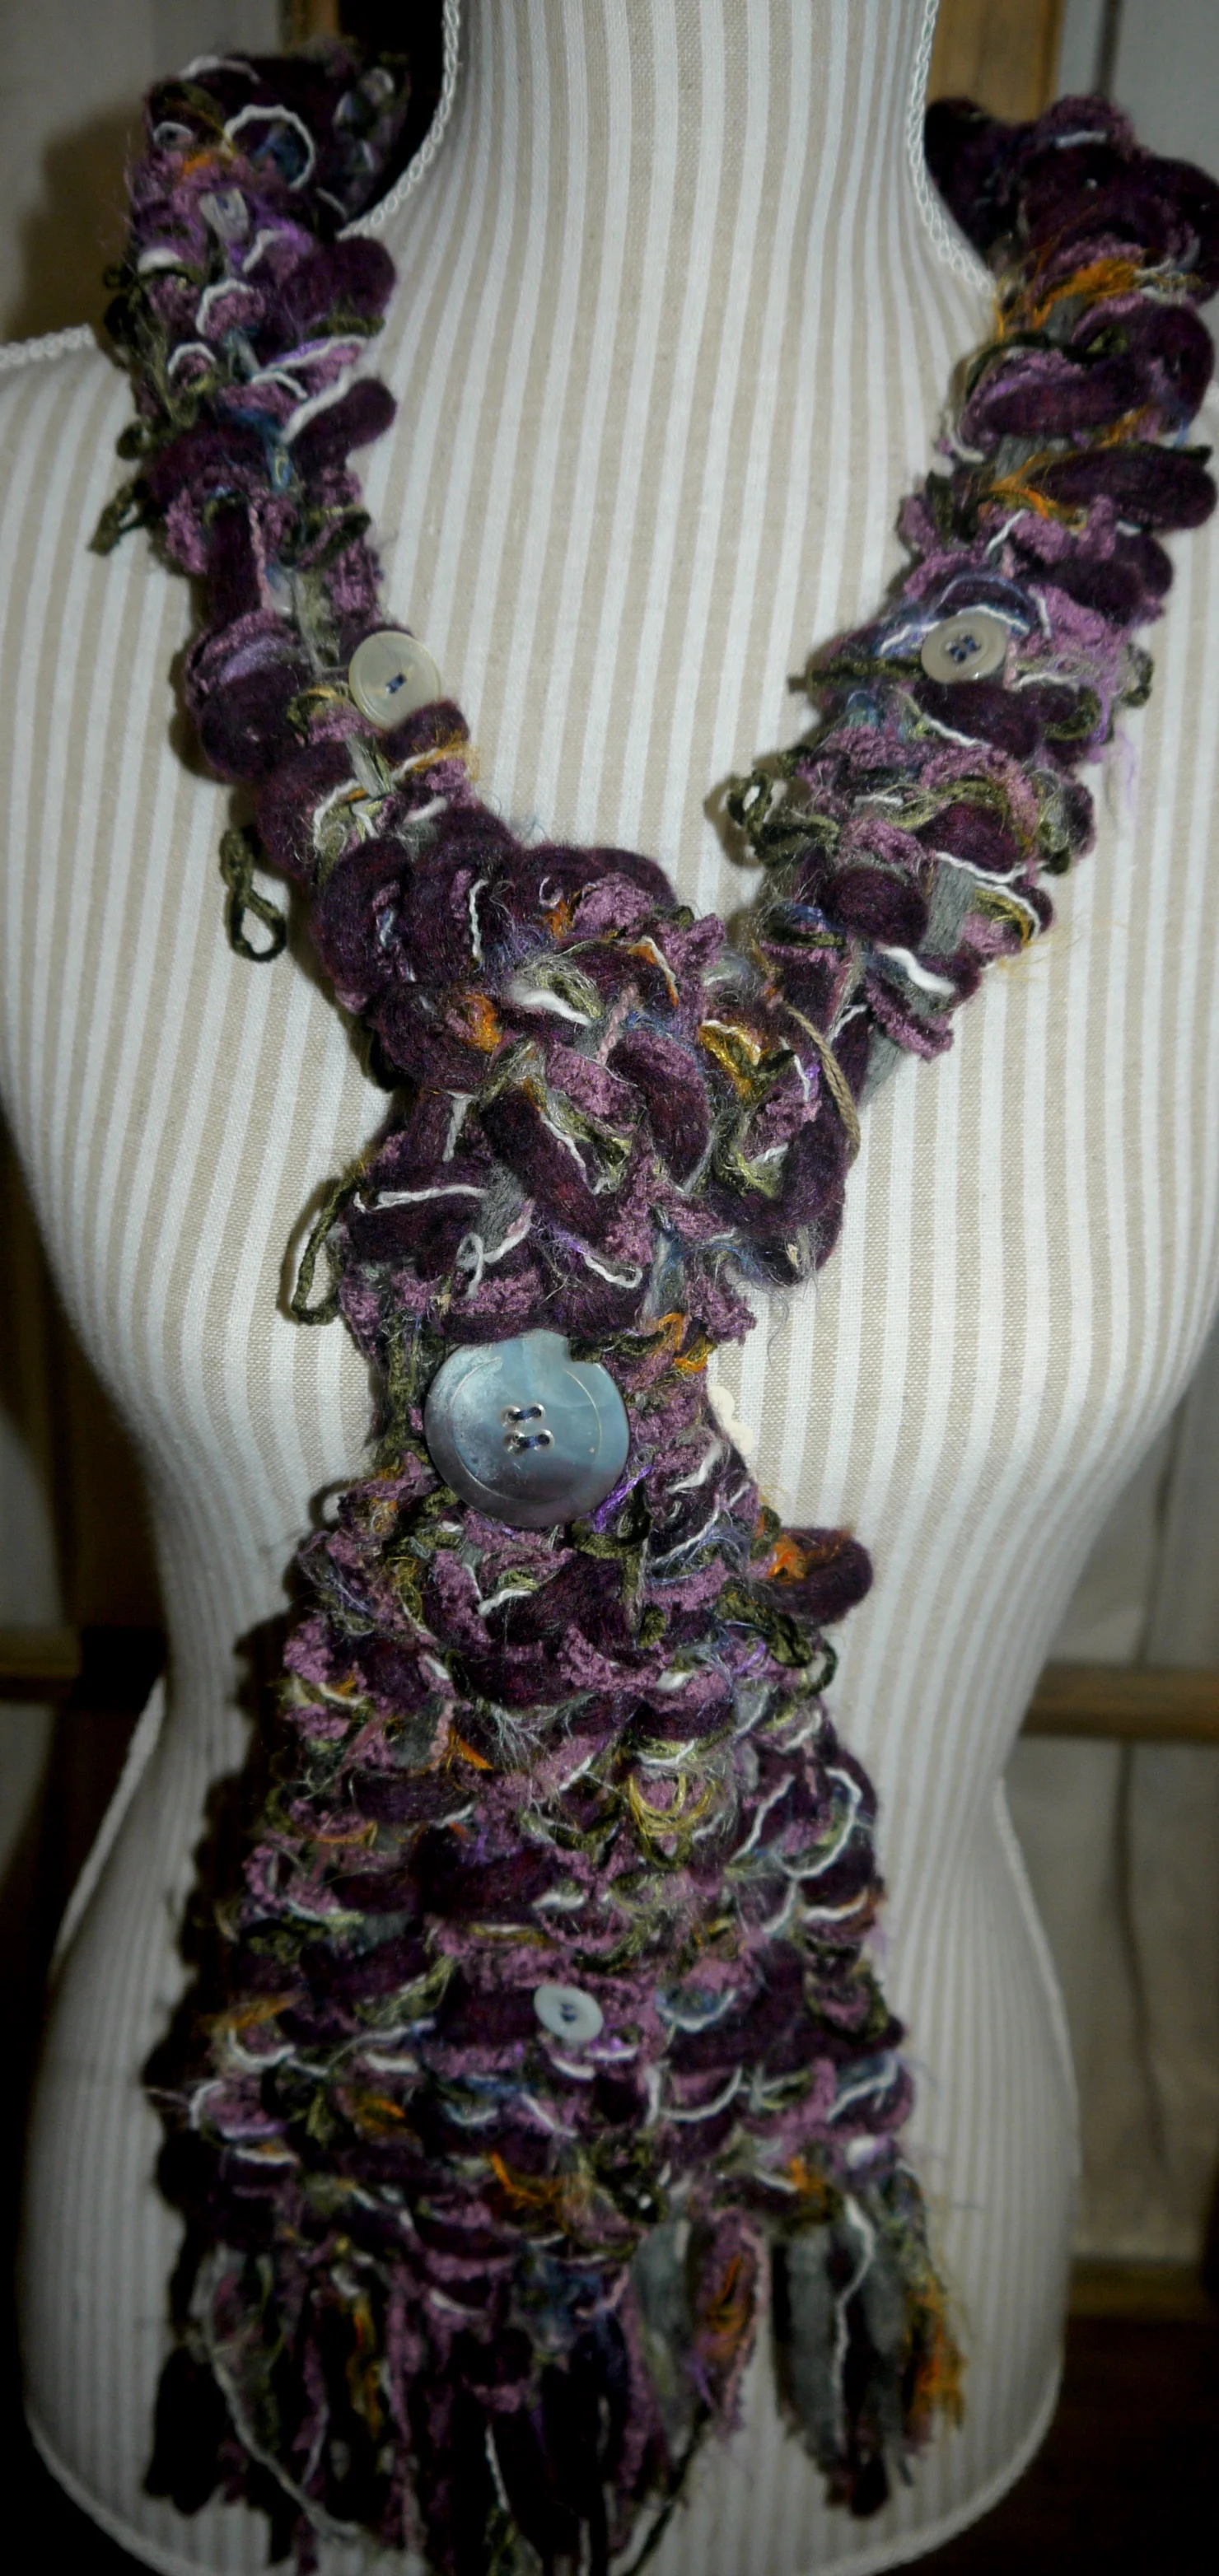
I've made a number of scarves using this board loom, here's a picture of another one I did. I sewed some vintage buttons on this one when it was done.
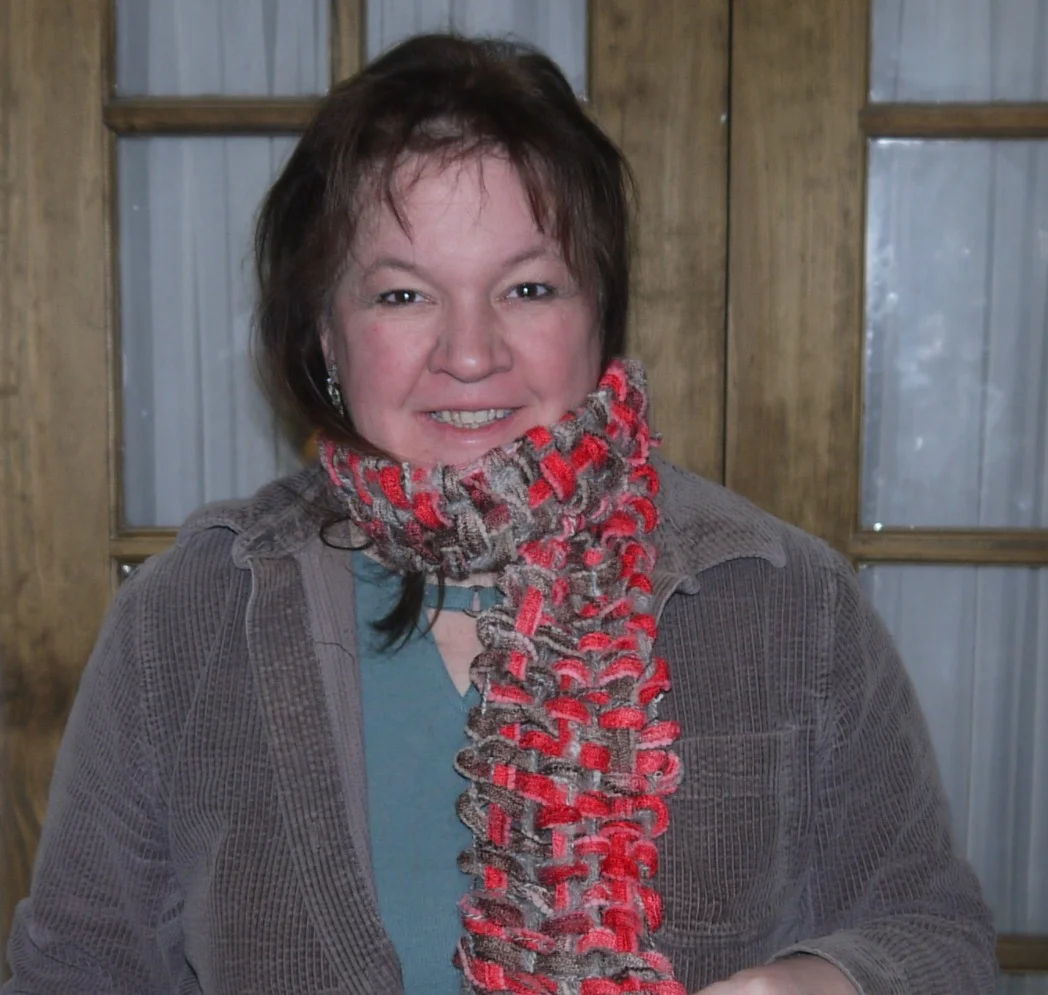
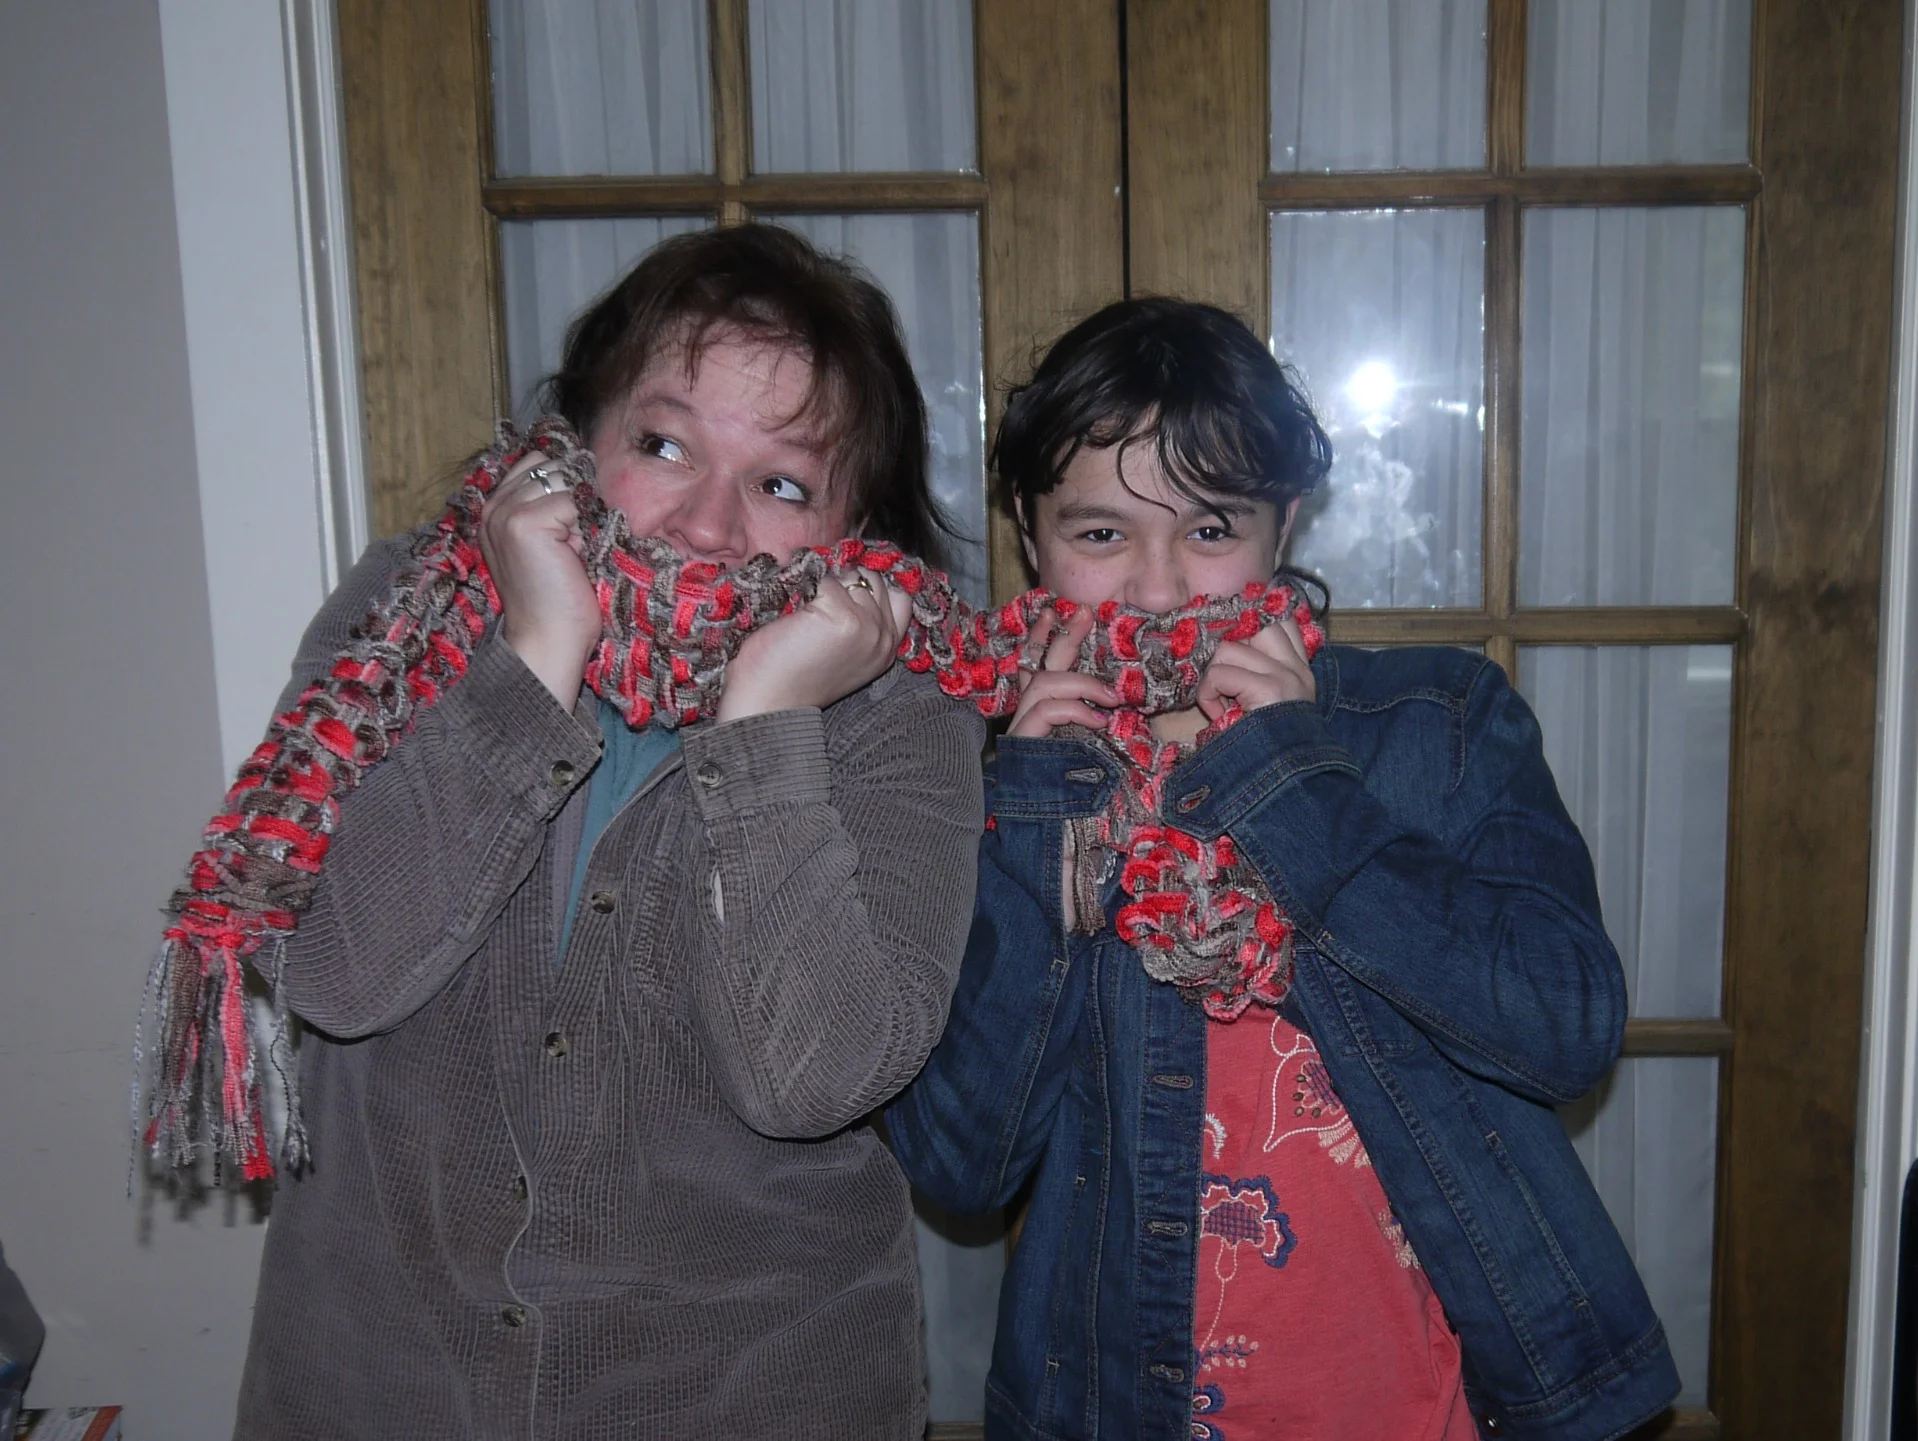
This is my daughter and I giving the scarf the "is this soft enough to have by my face and around my neck test". Yup, it passed the test.
Enjoy your weaving adventures!